Serge With Confidence: Part 5 - welcome friends at our blog, is a good home that can make you and your family comfortably occupied, on the blog Decorating Home Office we will discuss a lot of home design attractive and comfortable for you, okay now we're discussing about Serge With Confidence: Part 5, this information we collect from various sources so that you feel satisfied with the explanation:
Our last and final blog on our little serged baby set is a relatively easy lesson, since you have already cut out and serger shadow stitched your bonnet piece using the cover stitch. If you haven’t already cut out a batiste lining piece, do so now using your embellished organza top layer. Secure the layers together, wrong side of organza to right side of batiste, using pins or KK 2000. Serge with an overlock across the bottom and then around the curved edge.

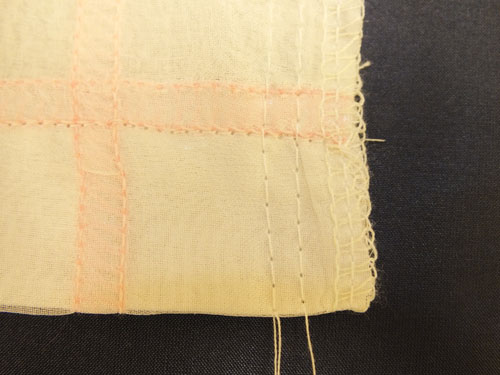
Turn up the bottom hem to the wrong side so that the serged edge just overlaps the lower edge of the shadow stitching(you should be able to see it through the fabric).

Press and take to the sewing machine. Topstitch on the right side just beside the shadow stitch line in thread color that matches your project. The stitching will catch the hem on the wrong side.
Now since your bonnet piece is curved all the way around, you will need to ease in the hem. Run two gathering threads at least 4.5 inches long 5/8 inch and 1/4 inch from the curved edge.
Pull the threads around the curve gathering slightly so you can fold the edge under to slightly overlap the shadow stitching line.

Run a ribbon through the casing using a safety pin.

Pull up the bonnet to fit. To secure the bonnet shape, stitch through all layers (including ribbon) at the edge of shadow stitching beyond the casing opening.
Tie knots in the end of each ribbon.
Gift a new baby girl with this sweet little serger set.

-Amelia
we think it is quite so first information about Serge With Confidence: Part 5 you can bookmark or share this link https://smoothielicioussims.blogspot.com/2013/05/serge-with-confidence-part-5.html if it is beneficial, if have any suggestions or QUESTIONS please fill in the comment box
Serge With Confidence: Part 5
 |
| May Book Blog: Serge With Confidence by Nancy Zieman |
Turn up the bottom hem to the wrong side so that the serged edge just overlaps the lower edge of the shadow stitching(you should be able to see it through the fabric).
Press and take to the sewing machine. Topstitch on the right side just beside the shadow stitch line in thread color that matches your project. The stitching will catch the hem on the wrong side.
Now since your bonnet piece is curved all the way around, you will need to ease in the hem. Run two gathering threads at least 4.5 inches long 5/8 inch and 1/4 inch from the curved edge.
Pull the threads around the curve gathering slightly so you can fold the edge under to slightly overlap the shadow stitching line.
Press. Straight stitch from the front around the outer edge, just as you did across the hem edge. This will create your casing. (You will have some gathering on the wrong side of the fabric, but since the bonnet is drawn up with a ribbon, this is fine.)
Run a ribbon through the casing using a safety pin.
Pull up the bonnet to fit. To secure the bonnet shape, stitch through all layers (including ribbon) at the edge of shadow stitching beyond the casing opening.
Tie knots in the end of each ribbon.
Gift a new baby girl with this sweet little serger set.
-Amelia
we think it is quite so first information about Serge With Confidence: Part 5 you can bookmark or share this link https://smoothielicioussims.blogspot.com/2013/05/serge-with-confidence-part-5.html if it is beneficial, if have any suggestions or QUESTIONS please fill in the comment box


